Chuck's Antique Telephone Blog

Is
there a topic that you would like me to cover? Please email
me using the "email & help" button at the top
of this page. Please put "Blog" in the subject line.
Replacing
the covering on a candlestick phone.
February
: It
is wintertime with thoughts of staying indoors and working
on some telephone projects. Collectors often come upon a candlestick
desk telephone where the covering on the base is missing,
torn or just needs to be replaced. Black phones can be found
with a felt-like dark brown cloth while some of the older
phones can be found with a suede leather covering. Nickel
plated phones can be found with the brown covered bases and
early phones with a green covering. Collectors like to use
the felt coverings from old pool tables or suede leather.
For purposes of this blog, I have found an old leather jacket
at a Goodwill Store as noted in the September blog below.
Today
I recovered the base of a Western Electric 20AL manual candlestick
telephone with a piece of leather from the jacket. The base
plate was removed from the phone and the retaining ring taken
off so the old material could be pulled off. To make placing
the material on the base, I cut a template out on a piece
of scrap wood using a dremel and a router as seen in the below
image:
Place
the material over the template and push the base down causing
the material up. Place the retaining ring over the outside
of the material, gathering it to the center and pulling the
edges in as tight as possible. Press the ring into the base
and use the hammer to press it to the bottom thus securing
the material as seen in the next image.
I
used an expensive punch that I bought at a tool store to cut
out the holes for the screws in the bottom of the leather
base. While some cut the holes prior to mounting the cloth
on the base, I find it easier to punch and line up the holes
once on as seen below.
The
last process is to cut off the excess material on the inside
using a razor. Original bases did not have excess material
showing.
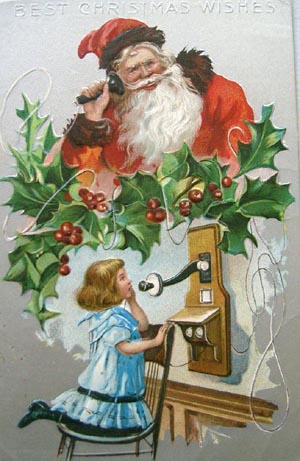
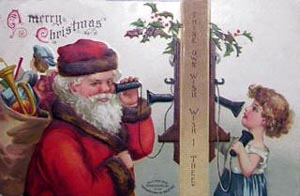
Christmas
with telephones.
December
12. It has been awhile
since I wrote a blog due to my travel schedule this fall.
As we move into this Holiday Season, I was thinking about
the past and how the telephone became an important tool during
this season for connecting with people. This idea showed up
early in the form of post cards and Christmas cards through
the ages. Below are just some of the cards that I have seen
since I have been collecting telephones and memorbilia.


Replacing
the covering on WE 302 feet.
September
12: There
are many occasions when one or more "feet" on a
Western Electric 302 ("Lucy phone"), or a WE 5302
as seen in my April 28th blog below, are worn or torn. Often,
collectors will recover these feet when they want a good looking
telephone to look better. Re coving these is not very difficult
and only cost pennies for each foot for materials. The hardest
part is to find an appropriate covering. Earlier sets were
covered in a suede letter. A good place to find inexpensive
covering is a Goodwill or other thrift shop. Take a couple
of feet in with you and search through clothing to find an
appropriate material. I recently found a nice dark brown suede
jacket that will give me plenty of leather to cover feet and
the bottom plates of candlestick telephones.
The
first step in recovering is to remove the old cover with a
razor blade or knife. Once off the bottom section, you will
notice a small hole on one side of the triangular base. Use
a punch or nail where you have removed the point to punch
out the upper portion that is holding the old covering. In
the photo above, the left hand image is of a damaged foot
taken from a phone. The two images on the right are the resultant
pieces once the covering is removed. Note the hole on the
right in the middle image. This is where a punch or nail can
be inserted to separate the two pieces.
Cut
a thick piece of felt (or a double piece) to be used as a
cushion on the bottom between the leather and the metal in
a triangular fashion as seen below and an appropriate size
of the leather. To make it easier to assemble, I have used
a piece of scrap wood and cut out a template of the foot using
a dremel tool as seen below. Note the pencil marks around
the template. This is so I can line up the piece of leather
when re-assembling the foot.
I
first place the leather over the template
then the felt followed by the bottom of the foot pushing the
entire assembly down as seen in the next photograph:
Fold
the leather over the bottom plate. Using a small blade to
make sure that all of the leather is in the foot, place the
top over and tamp with a hammer until all of the leather and
top is seated. I recommend replacing the covers of all four
feet on the phone for uniformity.
Making
new oak look old
August
28. Once in awhile an oak phone may need a part fabricated.
Most often we find wall phones that are missing a shelf or
part of one. For those that are not handy in the wood shop,
Phonecoinc.com sells new shelves and brackets made out of
new oak. To make the new wood look old to better match the
finish on the rest of the phone, my friend Walt Aydelotte
sent me his method.
Obtain
a box of Oxalic Acid from a hardware store. This is a wood
bleach that will ultimately leave the wood looking a battleship
gray color. The first step is to sand the entire piece of
wood to open the grain and then paint on the oxalic acid liberally,
letting it soak in. Dry overnight and then repeat this process
a second and possibly a third time. Once dried, sand the piece
again making it as smooth as desired prior to staining, using
whatever stains you need in order to match the color you are
trying to duplicate Let the stain dry overnight and apply
a second coat, wiping off lightly so as to not leave any puddles
or globs of stain. Again, let it dry overnight and repeat
the process until the new color matches the old continuing
to "tweak" this coloration until you are satisfied.
Put on a good sanding sealer and after allowing an overnight
drying, sand lightly with 0000 steel wool. Clean the surface
with a tac ray and brush on a clear satin polyurethane. After
allowing to dry thoroughly, sand with a fine grit sandpaper
and tac rag off any sanding dust. Apply a second coat and
sand with 0000 steel wool after it has dried overnight. Walt
uses a final coat of Spray Minwax Fast Drying Polyurethane
Clear Semi-gloss. This can easily "run" so you might
want to do a section at a time, keeping the sprayed surface
flat, parallel to the floor. This stuff sets up in 5-7 minutes,
so not waiting time is required.
Do
not rush this process or cut corner to the the project done
quickly If done properly, the phone will look great and you
will not be able to tell the old from the new
Updated
information on Aug 30: My fellow collector, Tom,
sent me the following information on the above process:
"I've
used Walt's method numerous times with excellent results.
However, there is an alternative process in the finishing
steps that the old oak furniture (and phone makers) used to
avoid problems and speed up finishing. My grandfater went
to work in an oak furniture factory at 12 years old - he was
the first of the old timers to tell me the "tricks".
The key is to alternate solvents in the finishing process.
One of the potential problems of Walt's process is that the
stain, the sanding sealer and the poly may have the same or
similar solvents. That is the reason he advocates allowing
adequate drying time between steps. If you are too hasty (or
in damp weather) the solvent of the next coat can dissolve
part of the previous coat - it has happened to me - I assure
you it is no fun to go back and start over.
To avoid that I use one or more very light coats of shellac
instead of the sanding sealer - the shellac solvent is alcohol
and it does not affect the solvent of the stain and it is
not affected by the solvent of the finish coat. In fact, I've
switched from regular poly to water based poly with better
results - and the final spray coat can be eliminated completely
by using multiple thin coats of poly which dry faster than
solvent based poly.
The shellac coat dries very quickly and allows applicaton
of the final coats earlier than the sanding sealer permits.
No matter which method you use, you need to allow time for
drying thoroughly. Both methods produce excellent results.
This is nothing new - my grandad and his cronies were doing
it this way (or something similar) a hundred years ago."
Removing
paint from a thermoplastic telephone
July
2 . I
was rummaging through a box of old telephones and decided
to restore a dirty Western Electric 354 that had a lot of
paint splatters on it. Quite often these old wall phones were
not taken down when walls were painted and paint splatter
is quite common and difficult to remove. One method that I
found to work is to use automobile brake fluid, an old tooth
brush and a rag. Simply dip the brush in a small container
of brake fluid and gently brush over the affected area several
times. The paint (and the thermoplastic) will soften and the
area is than wiped with the rag. This process will take quite
some time because as the thermoplastic becomes soft, the project
has to be left for awhile to harden. I've had one phone take
all week to clean but it is worth it. On your first try, perhaps
you can practice on a cracked or non-essential phone. After
all of the paint is removed and the plastic on the phone has
been left to harden for several days, normal restoration as
described in my April 28 blog was used to obtain the desired
results as seen below on the right.
Here
are the results of my restoration:
Restoring
a Western Electric model 5302
April
28. I
just located a 5302 and decided to document it's restoration.
The picture on the left is the as found BEFORE restoration
telephone and the one on the right is the same telephone finished
AFTER restoration, complete with modular cord and working.
A
5302 looks almost like the standard rotary phones of the 50's-80's
but upon closer look you see marked differences. Note that
it is shorter than the model 500. In addition, notice that
the dial is a metal 3 inch dial surrounded by a plastic number
shroud. The switch hook area was molded to accommodate either
an F or a G handset. When the phone is opened you will notice
that the base, bells, network and condenser are from a Western
Electric 302. Some have called the 5302 a "transition"
phone between a 302 and a 500 since the housing is a 500-like
over a 302 base. In actuality, this phone was made for the
Bell System to help with the demand for the newer 500 model
and a way for the phone company to save money and use many
of the parts they were collecting when replacing 302's. Was
the Bell System "going green" or saving money?
To
begin the restoration, remove all of the parts. I would highly
recommend taking notes and diagram all of the wiring.
My
first process was to wash all of the plastic parts. Many collectors
place the parts in their dish washer. My wife objects so I
used dish washer detergent and a five gallon bucket of warm
water. The housing is "soft plastic" and most likely
has many dings and scratches. I use fine grit sandpaper and
fine steel wool to sand out scratches followed by Novus 3
and Novus 2 gritted polish (see February 2 for sanding and
the March 25 blog below for polishing).
My
next step was to remove the parts attached to the base to
clean. There are some who like to polish each screw. I don't
tend to be that fastidious but in this case I did use a mild
cleaner and fine steel wool pad on the metal parts. The bells
are brass and were polished. I like to use a common cleaner
such as 409 on the coiled handset cord, recoil it on a dowel
and put a finish polish such as Novus 2 on the exterior. You
can tell the difference between the before and after photos
below:
Remove
the finger wheel, the porcelain number plate and dust barrier.
If the dial was sluggish, clean the pivot points with kerosene
and then re-oil with a small drop using a fine clock oil.
Do not use a WD-40 type lubricant. In short order dust will
collect and the dial will gum up even more. Polish the number
plate and finger wheel. Novus 2 will do a good job on these.
Reassemble
all of the parts and add a modular cord if you plan to use
the phone on today's telephone system.
The
finished telephone will not look as it came out of the factory,
but pretty close. Questions? Email me from the link just to
the right of the moving dial above.
Restoring
the "shine" on plastic telephones
March
25. Perhaps
you have been to a flea market, thrift shop or garage sale
and found a nice old rotary or touch tone telephone that is
dirty and has a number of scuff marks on it. What methods
do you use to get the phone back to a presentable shape?
While
there is no one perfect approach, my method is to first remove
the telephone's housing from the base, remove the handset
capsules and handset cord as well as the line cord. I now
have four pieces of plastic and two cords to clean. If very
dirty, I will take them to the sink and use a detergent on
the parts. Some collectors will place them in the dishwasher
and allow them to go through a cleaning cycle. My wife isn't
as understanding about my collection as much as some collector's
wives are so I can only rely on this "sink method."
Often the cords are quite grimy so I need to spend a lot of
time with a cleaner and an old terry cloth on them.
Once
all of the dirt and grime have been removed, I now use a gritted
polish. Many years ago I became a believer and fan of Novus
plastic polish and scratch remover. This product comes in
a three part system for various types of scratches.
I
start with Novus #3 on a clean soft cloth, usually a piece
of an old terry towel, applying the paste liberally and rubbing
back and forth at right angles to scratches on the surface
of the phone. Keep the cloth saturated with the polish. Continue
polishing until only small scratches are visible. Clean off
any white film left by the polish with a clean cloth.
Using
another clean cloth, apply Novus #2 in a more circular motion
uniformly over the entire surface. Continue until the tan
polish becomes a dry light haze. Using another clean cotton
cloth, buff the entire area. If you can still see scratching,
you should repeat the process. After you are satisfied with
your results, apply Novus #1 liberally using broad strokes.
This is no need to apply a lot of pressure on the cloth.
Your
plastic phone shell, handset, and finger wheel should now
look close to the way it appeared when the telephone man delivered
it many decades ago and worthy of placing in your collection.
You
can also use this process on the telephone cords to clean
and polish them. Once you have finished cleaning the coiled
handset cord, you and reform it on a piece of doweling.
I
do not sell Novus but a quick google search will result in
numerous retail sources.
If
your phone is discolored, Novus will not remove stains. Collectors
use a different process which will be described in a future
blog.
Removing
the finger wheel from a 500 type phone
February
26. There
is another snowstorm occurring here in the Northeast with
about 20 inches now on the ground and it is still snowing.
It is too cold to work in the shop (my garage) so thought
I'd bring a project inside to work on. I decided to replace
the old used number cards on some of my Western Electric rotary
500 sets with new ones that I scanned and printed. I have
used the number card found below. Just copy this image and
print it out for your own use. This is what the number card
looks like on my moss green desk set that I just completed.
I
receive an occasional email from someone asking how to replace
the number card on the telephones with the clear plastic finger
wheel.
The
process is an easy one and the only tool needed would be a
standard paper clip. No, the telephone installer didn't carry
paper clips with him for this task rather he had a pencil-like
tool with a metal tip the size of a paper clip.
Look
at the dial and you you will see a small hole drilled between
the "9" and the "9" finger holes. Open
one end of the paper clip and push it into that hole. Turn
the dial all the way clockwise and push down down on the paper
clip which presses on a metal tab that holds the finger wheel
in place. While holding this "spring" down with
the paper clip, force the dial one more space clockwise. The
finger wheel will come loose and it can be removed from the
phone.
To
put the wheel back in place, put the "0" hole over
the number "9" on the dial and turn the wheel counter-clockwise.
The "spring" will fall back into place in the slot
of the wheel and the finger wheel will stay in place.
Looking
for a number card to place on your dial? Below is one from
the proper era that can copied (right click) and printed.
It should print at the proper size.
Nickel
Plating Phone Parts
February 4. Do you have a telephone with
some nickel parts where the nickel plating is shot? The choices
we face are limited. We can leave the nickel as found; strip
and buff the part back to it's brass base (old phones were
never supplied in bare polished brass); paint it black; have
the part professionally plated; plate it yourself.
Self-plating
is not difficult. Many collectors use an inexpensive Texas
Platters Nickel Kit. This is available from Texas Platters
Supply, 2453 W. Five Mile Parkway, SGN., Dallas, Texas 75233.
Phone (214) 330-7168. The kit consists of a plating brush,
wire, clips and a small jar of copper and nickel plating jell.
About
ten years ago, fellow collector, Steve Brink took his old
worn nickel plated Stromberg Carlson "oil can" phone
and re-plated it using the Texas Platters' kit. The results
were quite stunning. Those who saw the phone at the Abilene
Telephone Show were amazed at his results. The photos below
do not show the actual beauty of Steve's accomplishment:
The
most difficult part is the preparation of the metal parts.
It is best to dissemble the parts of the phone, taking careful
notes as to how to re-assemble. All of the old nickel must
be removed. This can be accomplished with 320 grit sand paper
(I like to use emery paper). For hard to reach and detailed
areas a dremel tool with a brush attachment and polishing
compound would be appropriate. For any pitted areas, use a
220 grit sand paper. Keep progressing using higher and higher
grit sandpaper, each time moving up 100 or so grit increments
until you reach 1000 grit. At the higher levels of grit, I
like to use the "wet sandpaper." Once at this level,
I use a buffing wheel to polish the brass so that it is mirror-like.
If you see any scratches, go back over them with the sandpaper,
finding the grit that will remove the scratch and work back
up the grit scale. The brass should now be consistently "mirror-like."
It would be best to go over all the parts with a commercial
cleaner such as Semi-Chrome and buff with a very soft cloth.
Once
the metal has been prepared, plating can begin. Just prior
to plating, clean off the surface with a non-lotion soap to
remove any oil that may be on the parts. Some have used a
wash of denatured alcohol very successfully. Using the instructions
that come with the plating materials, connect the negative
side of a battery (3 volts DC are required. This can be done
with two 1.5 dry cells or a three volt DC power supply. I
use a universal AD/DC adaptor turned to 3-4.5 volt level.
I've cut off the pin on the end of the wire and connected
the clips that are supplied with the kit) to the part to be
plated. The positive side clip gets attached to the handle
of the plating brush. Dip the brush into the supplied solution
and "paint" on the plating. I have to clean the
brush often as the metal comes out of the jell.
Once
plated, clean off any excess with soap and buff with a cloth.
Note:
the kit consists of two compounds, copper and nickel. It is
best to copper plate and then nickel over the copper. If you
don't like the results on a piece, the plating can be removed
with sandpaper.
Cleaning
Nickel
February
2. Ah, Ground Hog's Day! Now that we will still have
a lot of winter ahead of us, according to the little critter
that saw it's shadow this morning, it is time to think about
cleaning up some of the old telephones we have sitting around
the house. For my first blog entry, I thought of that old
nickel that we see on the early stick phones and on the plated
bells and transmitter faceplates on the old wooden phones
that might be blackened by age. Is there a "safe"
way to clean the nickel?
If
the nickel appears to be in decent shape, probably the best
way to clean it is to use common household ammonia. After
removing the nickel part from the phone (remove the transmitter
parts from the faceplate first), immerse it in a small container
with the ammonia. I often leave the part immersed for several
hours. You will see the ammonia turning a bluish color as
it removes tarnish. Buff the nickel with a soft cotton rag.
I've found that my old cotton tee-shirts work really well
for this task.
If
the nickel is too far gone, ammonia will not help and the
best suggestion would be renickeling the part. I'll give a
few hints on this process in my next blog.